
Immediately after arriving in Washington from our delivery trip up the coast, we hauled out at a boat yard in Anacortes for the winter. We had a long list of sailboat restoration projects to tackle before we would be ready to move aboard that summer.
Undoing the damage from our delivery
REPAIR FORESTAY If you recall from our trip up the coast, our forestay and storm jib went crashing into the water during a storm as we rounded Cape Flaherty. Fortunately, the forestay isn’t crucial to support our free-standing mast, but it is crucial for running our headsail. We repaired the forestay using an industrial adhesive called Crestabond (it has now been over two-years, and our forestay is holding up perfectly!)
FIX LEAKS Over a decade of sitting in dry, sunny Southern California didn’t do any favors for our boat’s water-tightness. All porthole gaskets were dried out and cracking, and every hatch leaked around the acrylic. We replaced all gaskets and treated them with Vaseline to keep them hydrated. We then re-sealed all deck hatches around the acrylic.
REPAIR MAIN SAIL Since our mainsail tore from leech to luff as we left San Francisco, it needed a solid professional repair. Funny enough, as we were removing the sail and getting ready for our haul-out in Anacortes, we ran into a sailmaker from the Seattle area on the dock. He offered to take our sail then and there, and we were more than happy to hand it over. North Sails did a phenomenal job with our repair, extending the life of our tired, 30-year-old sail for at least another few seasons.
Getting rid of the stink
When we first went to look at our boat before making an offer to buy it, the biggest thing that stood out was the STINK. I’m talking plug your nose, can’t get used to it kind of smell. At the very top of our list of sailboat restoration projects before we could even think about moving aboard included eradicating the stink for good.
REPLACE HEADLINER The original headliner (ceiling) throughout the boat was made of thin wood panels wrapped in foam-backed vinyl. There was some visible discoloration, but once we removed a panel we realized nearly every inch behind the boards was moldy. We ripped out each panel, made templates, and installed new headliner throughout the boat using a plastic polywall material. No more mold for us! This was one of our bigger sailboat restoration projects that was challenging to DIY. Aside from a few YouTube how-to videos, there wasn’t much info out there for how to tackle this project without paying a professional to do the job. We learned a lot and would change a few things in retrospect. I’ll have to write more about this project in a future post!
REPLACE SANITATION HOSES/INSTALL COMPOSTING HEAD If you’ve spent some time around boats you’re probably well accustomed to the typical smell that comes with any boat head. Well this was on another level. It was clear the sanitation hoses in both heads had never been replaced, and the smell was now a permanent guest. Chris got the dirty job of removing all hoses, removing and cleaning the holding tanks, and reinstalling new hoses. We opted to only keep one traditional head and holding tank then replace our aft head with a composting system.
REMOVE HULL-SIDE CARPET AND PAINT STORAGE AREAS The insides of our large storage cubbies had a lining of old, dusty, musty carpet that had to go. We ripped out the carpet which was harboring all kinds of smells and opted for a fresh coat of paint instead. While we were at it, cleaned and repainted the insides of all large storage areas where we would stow food, household items, and sailing gear.
REFRESH CUSHIONS Most cushions throughout the boat also had some mold inside the foam. Getting brand new cushions and upholstery was well outside of our budget, so we opted for a deep clean. We removed and washed all fabric covers, then cleaned the foam cushions with a garden hose, tarp, and mold control products. I think some people are quick to think you need all new cushions on a boat every 10-years or so. If you have good quality cushions to begin with, you can really extend their life with cleaning and a bit of care.
Exterior sailboat restoration projects
INSTALL SOLAR PANELS AND WIND GENERATOR Having power while at anchor is much more sustainable when you can harness the power of the sun and wind. We installed two rigid 100 Watt Renogy solar panels on our stern pulpit and two 110 Watt flexible panels on our dodger. We also refurbished and installed a free wind generator that had a failed internal part. After some research, Chris ordered a relatively cheap part that he was able to solder and install inside the generator housing. It works perfectly!
INSTALL WIFI Having reliable WiFi on a boat takes a bit more effort than calling up an internet provider and plugging into the wall. The SeaBits blog by Steve Mitchell was particularly helpful for us when sorting out which system would work best for us. We ended up installing a MikroTik unit, which generally works great to amplify other WiFi channels and open hotspots for us to connect to.
REMOVE RADAR REFLECTOR FROM THE MAST The radar reflector on the mast above the forestay was a significant hazard each time we hoisted the main sail. The halyard would wrap around the unit and jam up, making it hard to hoist or drop the sail. We removed the large reflector and now have a smaller tube reflector installed on the stainless-steel mast at the stern.
PAINT THE BOTTOM Marine organisms and time did a number on the existing bottom paint, so it was time for a refresher. We taped off the water line, ground down the old paint, put barrier coat on the lead keel, and applied new anti-foulant bottom paint.
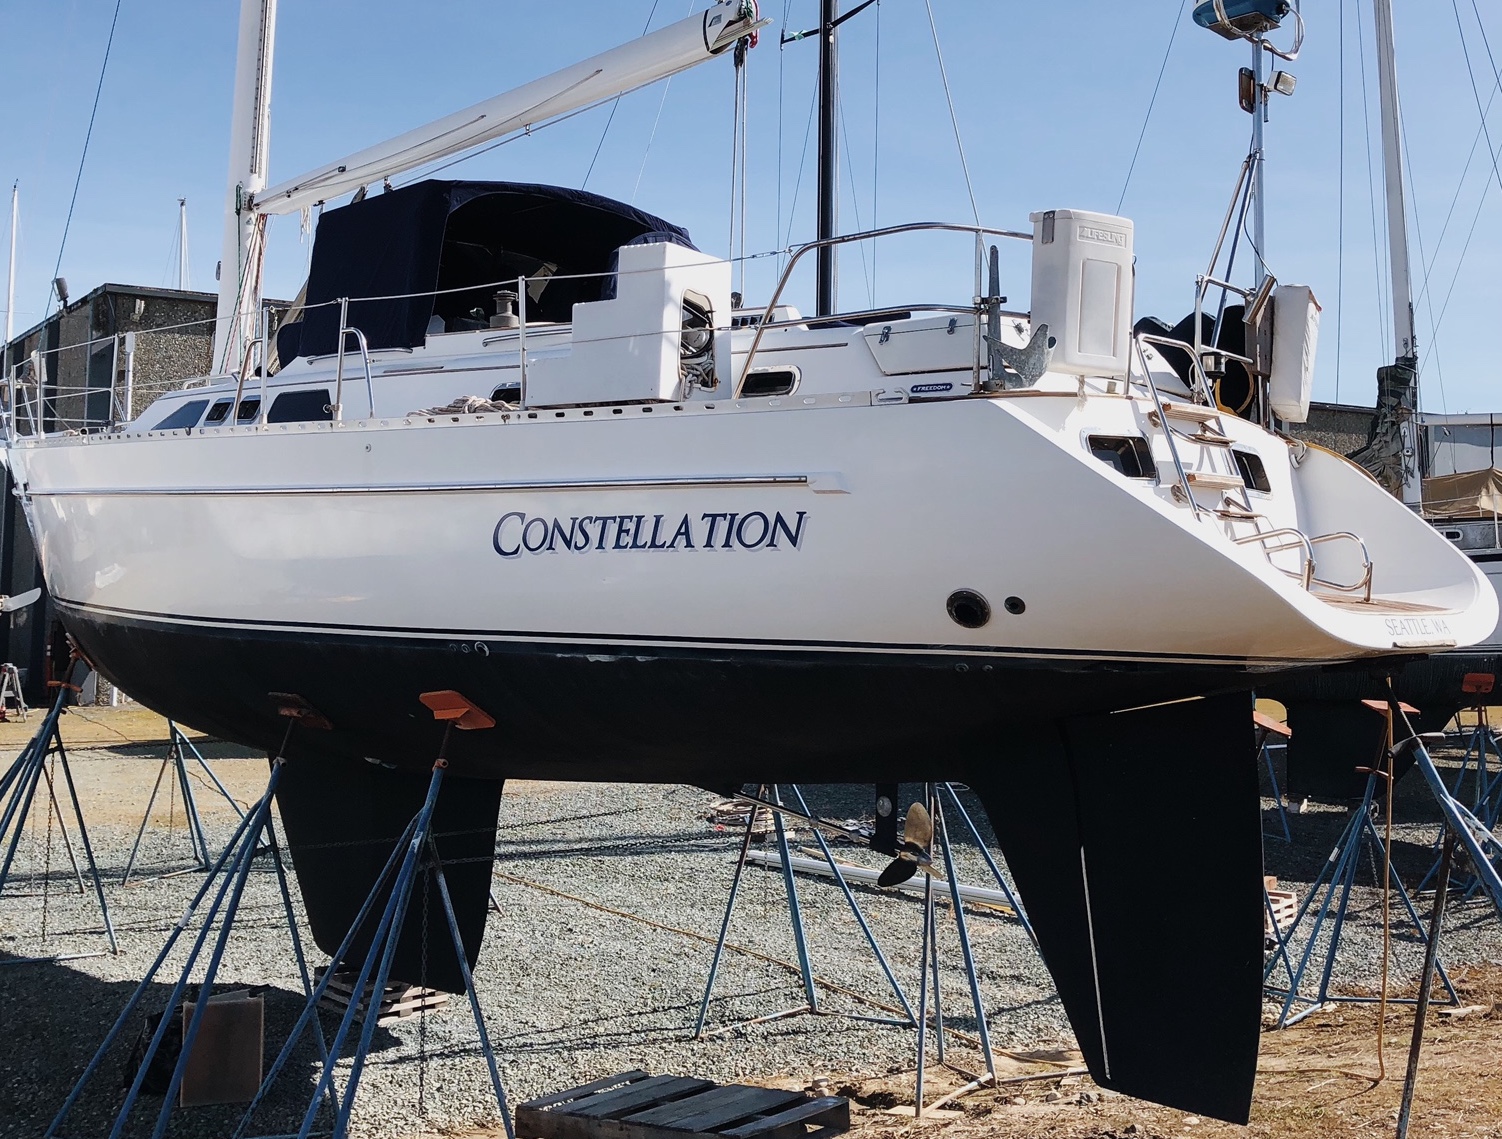
BUFF THE HULL AND INSTALL THE NEW NAME A little buff and shine goes a long way to liven up tired gel coat. Once the hull sparkled, we installed vinyl decals with the new name, Constellation, and hailing port.
Interior comforts
UPGRADE LIGHTS TO LED The original lights on the boat were old, inefficient, and dated. LED lights require very little power, will last virtually forever, and just plain look good.
CLEAN TANKS AND INSTALL WATER FILTER Our boat has a large water tank that we fill regularly and use for drinking, showering, and cooking. Before moving aboard, we treated the tanks with a bit of bleach, flushed them generously, and tested the water quality. We then installed a water filter at the galley faucet to make sure our drinking water was particularly fresh.
UPGRADE GALLEY AND SHOWER FIXTURES This was such a simple change that made a huge different for quality of life on board. Boats typically have small, utilitarian, “boat-y” faucets and shower set ups that just aren’t very luxurious. Swapping the old shower head and galley sink faucet was quick and easy but really helped modernize each space.
REPLACE MATTRESS The original mattress on the boat was just plain old and gross. The tricky thing with boat mattresses is they rarely fit a standard size. You have to either order a custom mattress or get creative. We got creative and cut our current foam mattress to shape using an electric turkey shaver and a bread knife. Hey, it worked!


